Visual art 2ND TRIMESTER
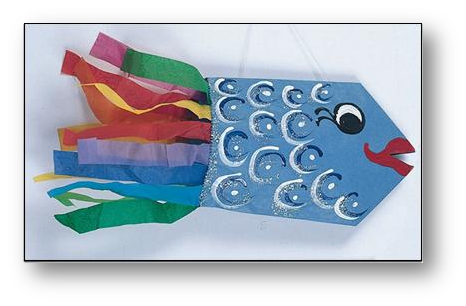
tunnel book
Lesson objective; to create a tunnel book using the materials supplied
One of the activities that was undertaken in EEA410 was to make a tunnel book. It was a great experience that I have actually incorporated into my after school care program. I love the idea of making a book 3D by adding depth through the paper- the final product looks great too.
When using this activity in the classroom I would ensure students had planned their book before proceeding in the creating process. The design is the most important part of this activity, and if the design hasn't been completed to satisfaction the book won't work. Students need to draw their picture and divide it into at least two sections foreground and background. This will ensure their book had a 3D effect. Ultimately students can create as many sections as they like. For middle years which is what the planning is for, I would use a minimum of four sections.
Materials needed for this activity include;
-paper, any colour
-black card
-pastels
-textas
-crayons
-pencils
-scissors
-glue
Link to the curriculum (AusVels)
Level 6
"Creating and making;
They investigate a range of sources to generate ideas and manipulate arts elements, principles and/or conventions in a range of arts disciplines and forms as they explore the potential of ideas."
(VCAA, 2013)
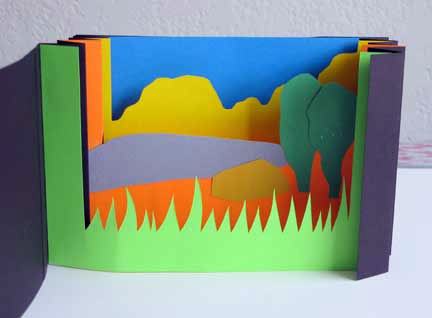
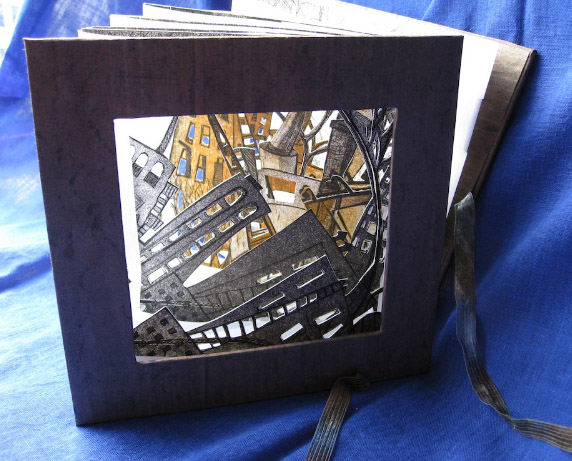
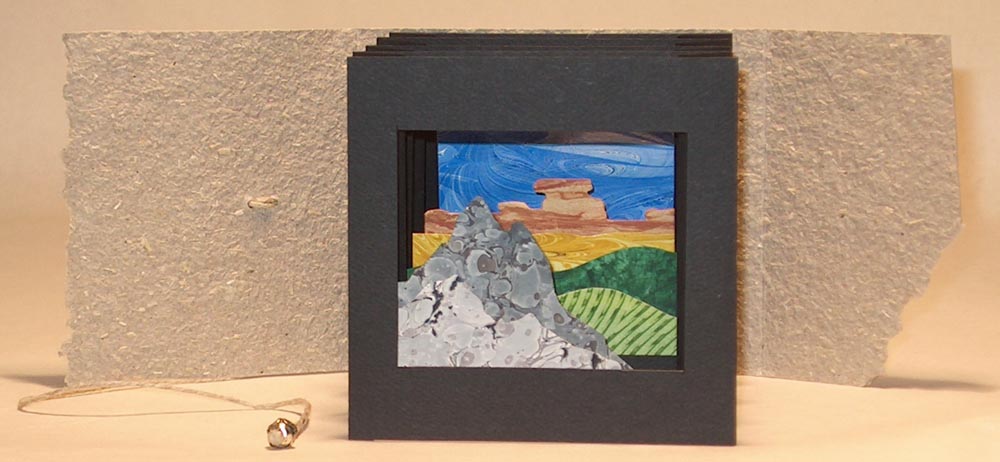
Below is some examples of tunnel books made by children.
One of the activities that was undertaken in EEA410 was to make a tunnel book. It was a great experience that I have actually incorporated into my after school care program. I love the idea of making a book 3D by adding depth through the paper- the final product looks great too.
When using this activity in the classroom I would ensure students had planned their book before proceeding in the creating process. The design is the most important part of this activity, and if the design hasn't been completed to satisfaction the book won't work. Students need to draw their picture and divide it into at least two sections foreground and background. This will ensure their book had a 3D effect. Ultimately students can create as many sections as they like. For middle years which is what the planning is for, I would use a minimum of four sections.
Materials needed for this activity include;
-paper, any colour
-black card
-pastels
-textas
-crayons
-pencils
-scissors
-glue
Link to the curriculum (AusVels)
Level 6
"Creating and making;
They investigate a range of sources to generate ideas and manipulate arts elements, principles and/or conventions in a range of arts disciplines and forms as they explore the potential of ideas."
(VCAA, 2013)
Below is some examples of tunnel books made by children.
| tunnel_books_lesson_plan.docx |
Here is a great clip for art teachers to watch on tunnel books.
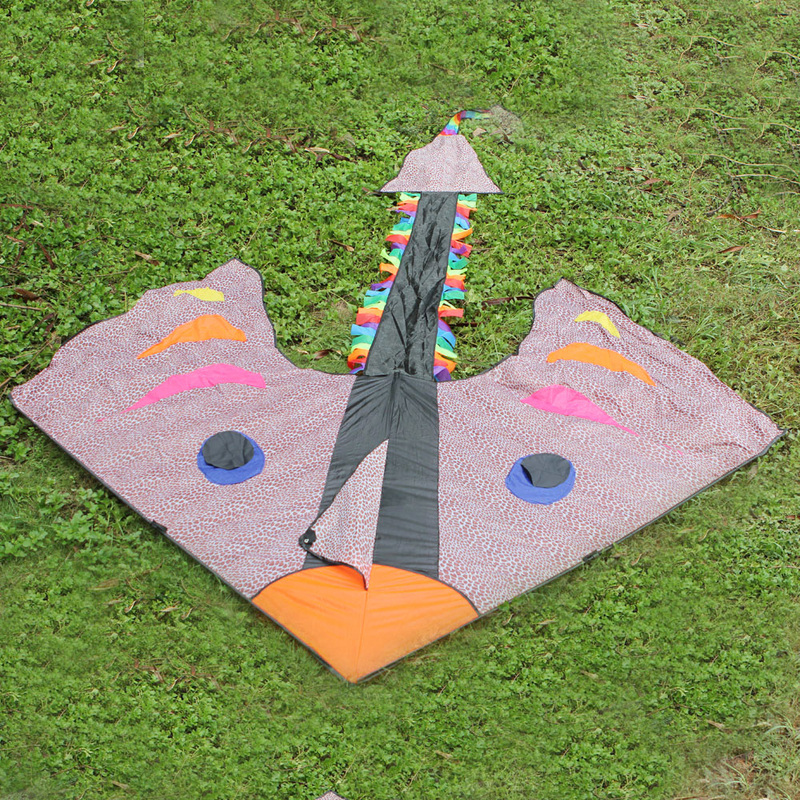
fish kites
Objective; From the materials supplied, create a fish kite that can be flown and used as a classroom resource.
I had fun creating my fish kite. It took a long time and a lot of patience on my behalf to complete. I suggest using this activity as a week-long activity, spending some time on it each day. The activity itself was easy and it is again something I have tried out at my after school care program as it is something all age groups can enjoy although prep/ones did need extra assistance by older students. Children enjoyed the end where they could test out their kites, apart from a couple of disasters of children's kites breaking overall it was a successful activity.
To create the fish kites, students needed the following;
-Large white paper/card
-Paper- various colours
-Cellophane- various colours
-Glue/sticky tape/adhesive
-Scissors
Students use the large white paper/card to out their fish, any shape they choose. They must use the entire sheet of paper to make sure their kite is of reasonable size. They must then choose what colours they would like the fish scales to be. They cut the paper into circles/semi-circles and place them on the white fish background. After both sides of the fish are covered in paper scales, it is time for the students to add the wire.
Link to the curriculum;
Level 4
'Exploring and responding
They identify and describe key features of arts works from their own and other cultures, and use arts language to describe and discuss the communication of ideas, feelings and purpose in their own and other people’s arts works.
Creating and making
They select and combine a range of arts elements, principles and/or conventions, and use a range of skills, techniques and processes, media, materials, equipment and technologies.'
(vcaa, 2013).
Below is some examples of fish kites children have made.
| fish_kites_lesson_plan.docx |
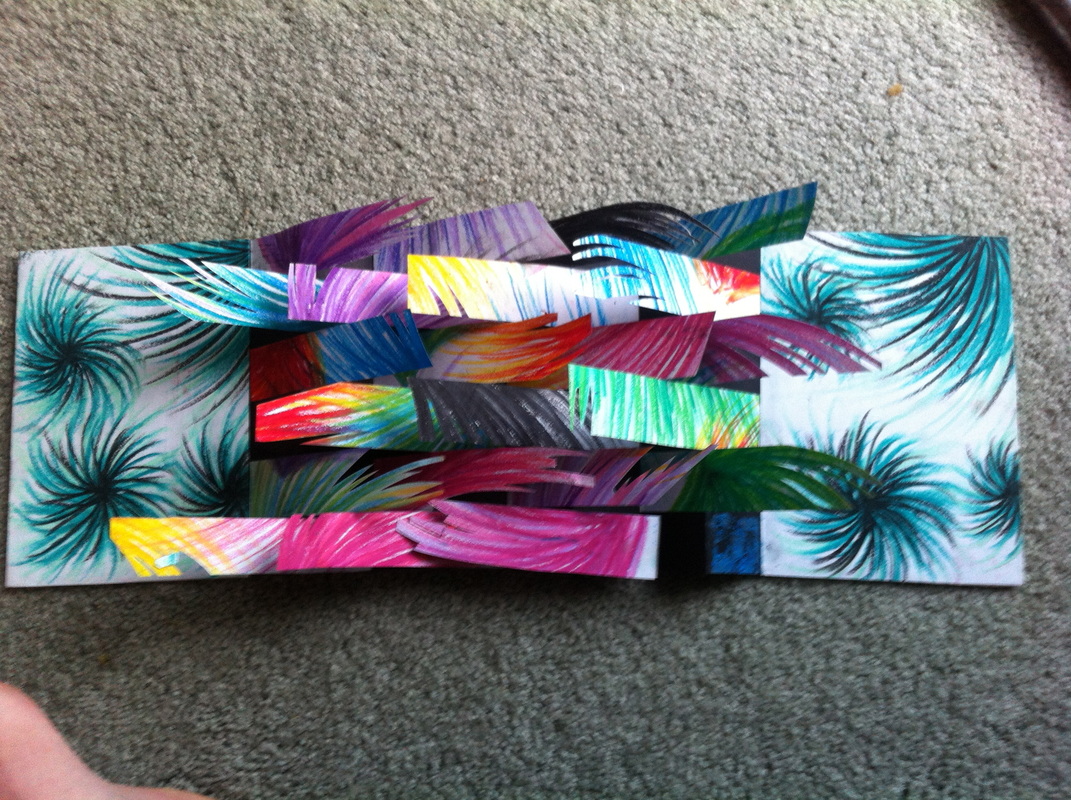
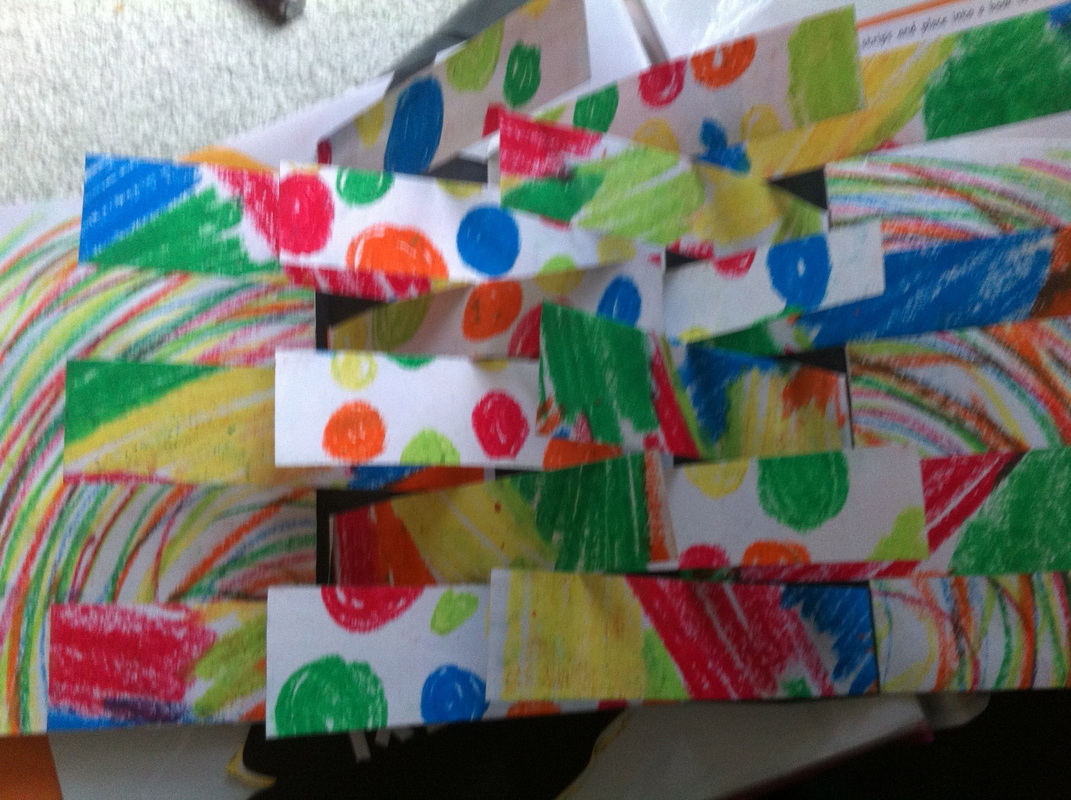
flag book
Objective; Using paper, cut strips and place into a book to create a flagged effect book.
Although I did not complete this activity under the supervision of my tutor, during the year I was looking for activities to do with my after school care children who love art and looked through D2L came across this activity in the Warrnambool area of D2L for EEA410 and due to the succession felt the need to document this. It was a fairly simple process for something that looks so complex and children produced some astonishing work which you will see in my photo gallery below.
The design process is important in this activity. Students must ensure they cover the white paper entirely with patterns. If there is too much white showing, the book won't have a good effect. It is also imperative that students equal sizes. If some strips are a little larger larger others the book won't fold out properly.
Materials required for this activity include;
-A3 white paper, 2 sheets each
-A4 white black paper, 2 sheets each
-pastels
-scissors
-glue
Link to the curriculum (AusVels)
Level 6
"Creating and making;
They investigate a range of sources to generate ideas and manipulate arts elements, principles and/or conventions in a range of arts disciplines and forms as they explore the potential of ideas."
(VCAA, 2013)
| flag_book_lesson_plan.docx |
pRINT MAKING
This activity was completed in a tutorial of EEA410, I loved it and had a lot of fun doing it. There were stages throughout where I made mistakes which I will learn from to avoid my students from making the same ones. I would recommend this activity to middle years students as it can be a fairly messy activity when it comes to the actual print making process.
The process went as follows;
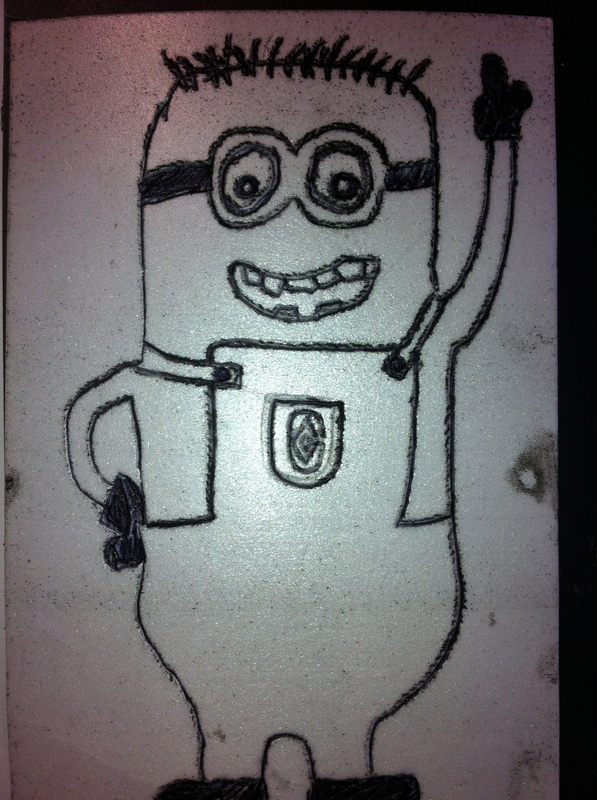
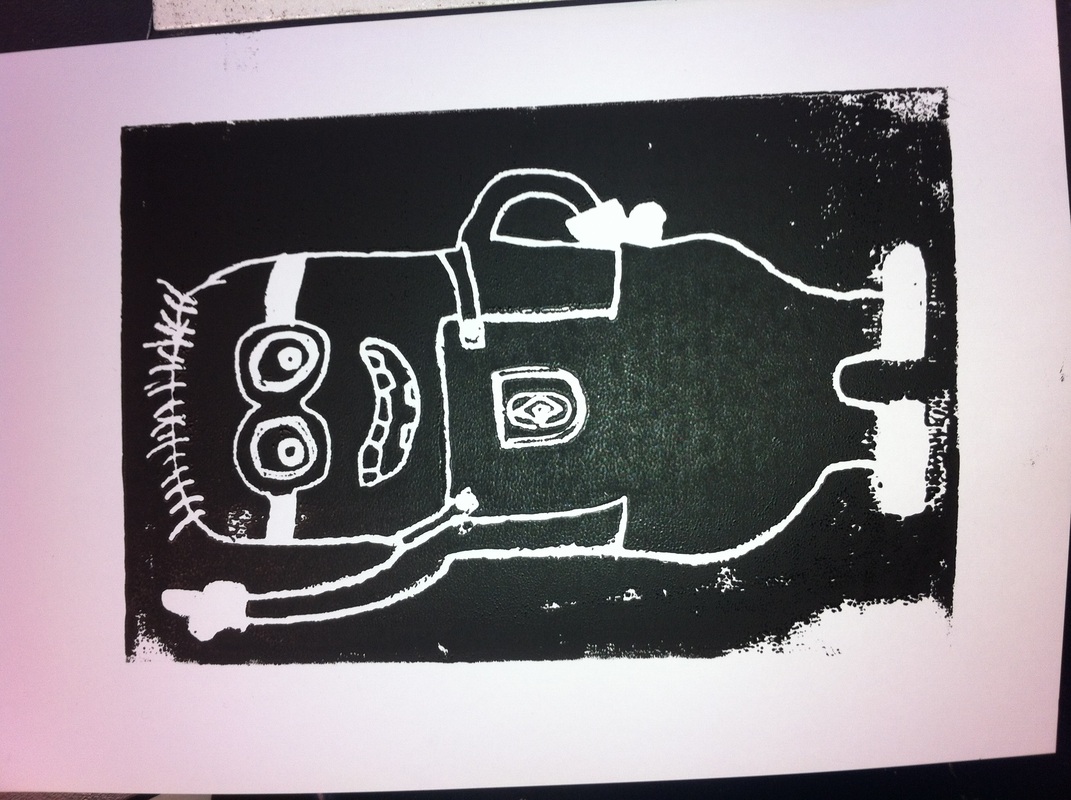
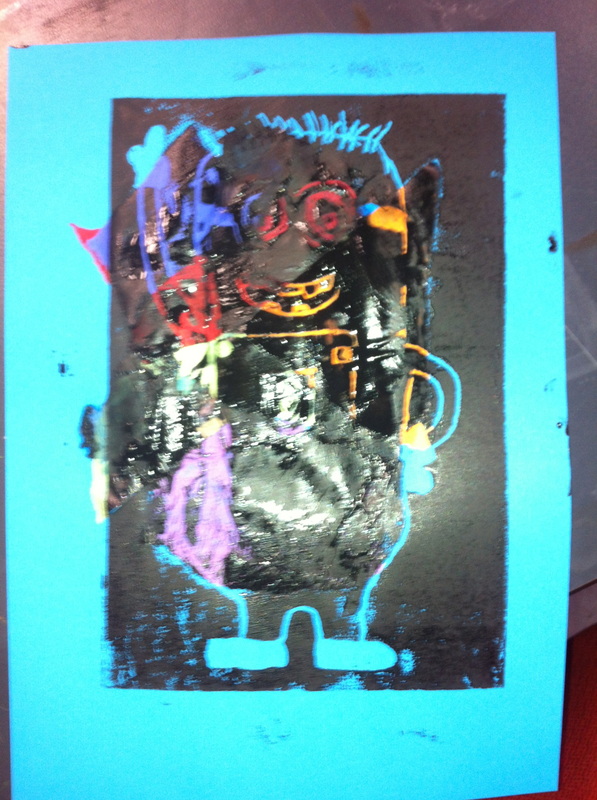
We created two plans and decided on our favourite. We then copied our sketches onto a foam square using a pen to push the indents in (make sure you push hard). Once sketch was completed onto the foam square, we then used a foam roller to paint the ink onto the design, ensuring that the ink covers the entire design equally. We then turned the design flat onto a plain piece of a4 paper and firmly push a clean roller over the top. Once completed slowly peel the foam off the paper, leaving you your end result. When creating different colours as your background cut and paste different tissue paper onto your backing page and repeat printing process.
Materials that are needed include;
-Smart board
-pencils
-erasers
-foam boards
-ink rollers
-ink
Link to the curriculum;
Level 6
creating and making
At Level 6, students independently and collaboratively experiment with and apply a range of skills, techniques and processes using a range of media, materials, equipment and technologies to plan, develop, refine, make and present arts works.
(vcaa, 2013).
Below shows the process I went through when creating my design. Make sure when you are cut and pasting different colours for your background you don't print when glue is still not dry (see the fourth picture of what will happen if you don't follow this instruction).
The process went as follows;
We created two plans and decided on our favourite. We then copied our sketches onto a foam square using a pen to push the indents in (make sure you push hard). Once sketch was completed onto the foam square, we then used a foam roller to paint the ink onto the design, ensuring that the ink covers the entire design equally. We then turned the design flat onto a plain piece of a4 paper and firmly push a clean roller over the top. Once completed slowly peel the foam off the paper, leaving you your end result. When creating different colours as your background cut and paste different tissue paper onto your backing page and repeat printing process.
Materials that are needed include;
-Smart board
-pencils
-erasers
-foam boards
-ink rollers
-ink
Link to the curriculum;
Level 6
creating and making
At Level 6, students independently and collaboratively experiment with and apply a range of skills, techniques and processes using a range of media, materials, equipment and technologies to plan, develop, refine, make and present arts works.
(vcaa, 2013).
Below shows the process I went through when creating my design. Make sure when you are cut and pasting different colours for your background you don't print when glue is still not dry (see the fourth picture of what will happen if you don't follow this instruction).

| print_making.docx |
